Dealing with lumbers is not an easy chore for any carpenter. To turn those bulky lumbar into usable boards, they go through a number of complicated cutting, sizing and finishes chores.
So, you might pick up a way to cut them with a bandsaw mill. So, it’s pretty obvious to come up with a question of- how to saw lumber with a bandsaw mill?
And how would be the quality of the cuts? Will this process ruin the woodwork?
Well, we’ve gone to the roots of this topic and we’ve researched it thoroughly. And we believe that if you follow the process perfectly, then there will be no quality issue.
So, it’s super important to follow the right process.
SKIP AHEAD
Basics of Sawing Lumber with A Bandsaw Mill
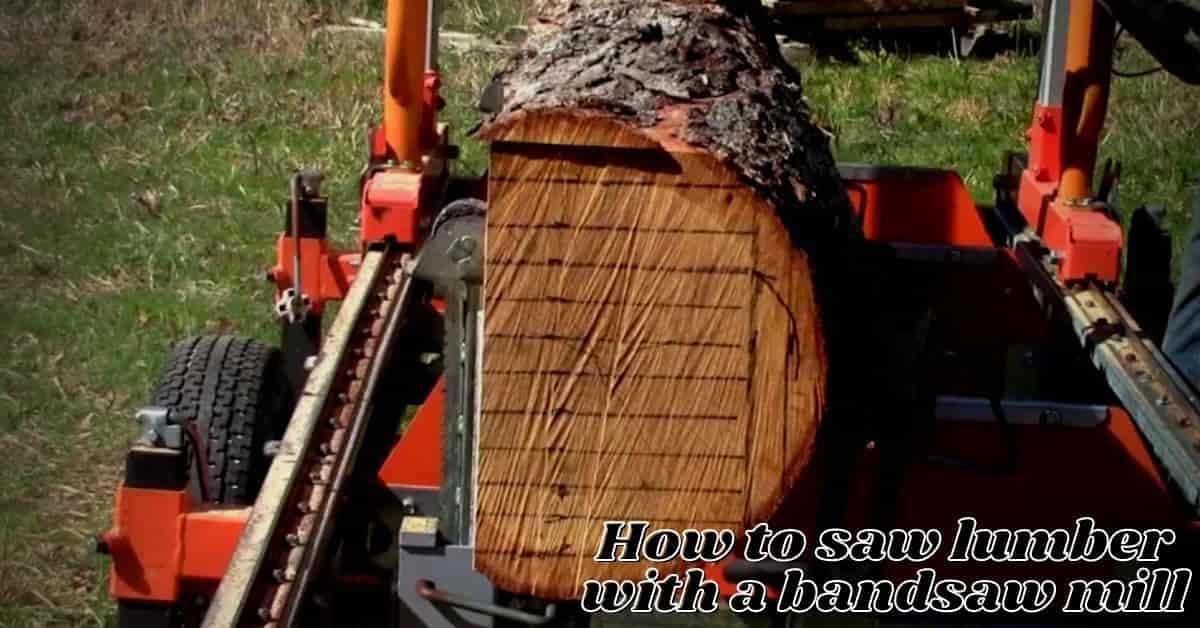
Carpenters and woodworkers usually don’t have the practice to saw lumber of logs with a bandsaw. But for your utter surprise, it’s very possible to do so and that’s what we will talk about in today’s post. But before that, here are some basics-
What Size of Lumber Should You Cut with A Bandsaw?
It’s quite important information to know what lumber sizes are able to be cut with a bandsaw. Usually, lumber and logs that lie within a diameter range of 16 to 18 inches are able to be cut under a bandsaw mill. The length should be around 2 feet.
7 Steps of Cutting Lumber with A Bandsaw
This is the core of the article for which you’ve been through the entire post. At this stage, we will take you through a 7 steps guide on how to cut lumber with a bandsaw mill.
Before starting, let’s assume that you’ve managed to cut the tree branch with a thickness of 16 to 18 inches, and a length of about 2 feet, and a bandsaw mill itself.
If done, let’s proceed with the steps of how to saw logs with a bandsaw mill–
Step 1: Mark the Miter Bar Locations
At first, you have to make the sled, which is a pretty easy task. It is a piece of ¾ inches of MDF which is 10 inches wide and 2 feet long. Now, measure the distance from the blade to the miter track. And afterward, it’s transferred into MDF.
Once done, lay an 18 inches long miter bar on the line and mark the location of the hole from the miter bar. It’s quite an effective bandsaw cutting technique.
Step 2: Attach the Miter Bar
Once done with step 1, you need to attach the miter bar to the flat-headed machine screws. Before that, you need to drill the countersunk holes into the MDF.
You have to prevent log sliding on the surface of the sled. In order to do that, a proper bandsaw operating procedure is mandatory. You need to cut a piece of drawer liner and use an adhesive spray to keep the log in place.
Step 3: Making the First Cut
Once done with steps 1 and 2 of how to saw lumber with a bandsaw, it’s time to make the first cut on your lumber. While going through the process, you need to make sure that any kind of log rocking doesn’t take place. In order to do that, you might need a wooden shim anyway.
Have a prediction of what you need to cut off in order to leave it with a flat surface. Eventually, you will find that it’s quite easy to pull the log gently and cut off the last few inches of the log.
It will eventually help your lumber to balance its weight. Based on the wood type, you can make other types of cuts as well.
Step 4: Making the Second Cut
After the 1st cut, it’s time to make the second cut on the lumber. It would be quite easier if you have made the first cut perfectly. The reason behind this is the bottom surface is now flat.
In the second cut, you have to take off a small amount of wood in order to leave it with a smooth surface. Don’t waste too much wooden portion of the lumber.
However, if you’ve to do resawing with a bandsaw, this step should be repeated several times.
Step 5: Cut the Boards
The reason why you are learning steps of cutting logs with a bandsaw mill is maybe, you want to make boards out of it. If so, you have to do the task of making boards at this step.
At first, decide the thickness of the boards that you want to cut. Usually, we would go with a board that is 1 inch in thickness. Once the first two cuts are done, take off the sleds and set up the entire fence of the bandsaw.
To get the most number of boards out of the lumber, you might alter the direction and face of the lumber after cutting each 1-inch board. The side that was facing down at the previous cut, should now face the fence at the next cut.
Step 6: Dry off the Boards
The boards that you have sources from the lumber, has to be taken through a processing phase to make them usable. It all starts with drying them up to get out the extra moisture from there.
To dry them up naturally, unstack them up, and expose the surfaces of them to open air. Don’t put them in a place like direct sunlight or heat. This will eventually, build cracks on the board.
Step 7: Smoothen and Surface the Boards
Once dried up, the boards are supposed to be surfaces and smoothened up. This particular task is done in many ways by many carpenters. We get to use a moisture meter to make sure that the board is with perfect moisture.
Once done, rip off the outer edge of the boards, and run them through a series of planer and jointer. Make enough planning that no unfinished surface is not there.
Bandsaw Sawing Techniques
Our described method was just one method of sawing with a bandsaw mill. We have 5 available methods of doing this.
And each of the techniques has a different name. Here’s a list of all the methods of using a bandsaw to cut lumbers-
- Live sawing or Slab Sawing (The technique described up there)
- Cant Sawing
- Grade sawing
- Plain Sawing
- Quarter sawing
Each of the methods has its own perks and cons. So, it’s important to choose the right technique in the right situation.
Bottom Line
That was the guide on how to saw lumber with a bandsaw mill. Hopefully, the steps have been easily explained to you.
If you still have any questions left, leave that in the comment section and we’ll come up with tips for cutting with a bandsaw.
- How To Hide A Shed From HOA (5 Easy Hacks) - September 8, 2023
- How to Hang Tools in a Suncast Shed (7 Easy Steps) - August 31, 2023
- How To Hang Stuff In Resin Sheds (5 Easy Steps) - August 29, 2023