Taking proper measurements to make a perfect equilateral triangle can seem difficult. Well, if you use a miter box it can make your work easier.
But how to cut an equilateral triangle out of wood?
You can cut the wood using a miter box. So, cut a 30-degree angle on the end, flip it. Flip the wood 180 degrees and measure it the length you want. Again you need to cut it according to your desired length. Then add wood glue to the end. Lastly, glue two pieces together.
Now, these are some basic processes that are not enough for you. And for that, we’ve provided you more information. This info can make your work easy.
So continue reading to know more.
SKIP AHEAD
Calculating Angles When Cutting Wood
Calculating the angles the right way is important. Here, failing to calculate the angles while cutting the wood can bring trouble. So, it’s important for you to know exactly how to calculate angles to avoid differences.
Begin by counting the number of sides of the wood. Then divide the number by 360. Divide the answer by two to get the miter angle.
We know that all angles are the same in an equilateral triangle. Therefore, the sum of angles for an equilateral triangle will always sum up to 180 degrees.
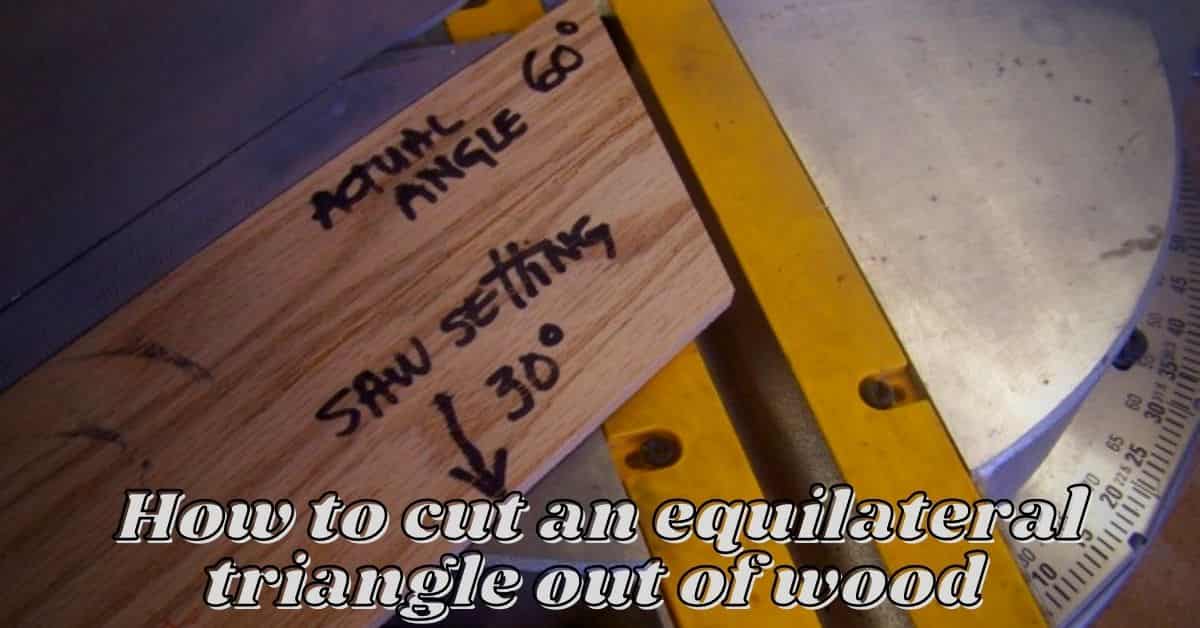
And so each angle in an equilateral triangle must be 60 degrees. Hence, you need to divide 180 degrees evenly between the three angles: 180 / 3. Which is equal to 60.
Here, if you are joining two pieces together, each will get half of that. That means each will be 30 degrees.
How Can You Cut and Make a Shelf Using an Equilateral Triangle?
Making geometric shapes may seem interesting. But making it by yourself can be pretty challenging.
However, with a little prior planning, you can easily overcome the challenges.
Before you start, you should think about some important things. For example, the design, which wood to use, etc.
But before you begin. Note down the tools you’d need for this.
- Wood glue
- Wood filler
- Band saw
- Scissors
- Paint or polyurethane
- Clamp
- Marker
If you want to make your own customized design, draw it on paper in advance. Even better, make a paper cut-out.
Now follow the below steps to make your perfect triangle.
Step 1of 4: Make The Outer Part of The Triangle
First, you need to take two planks of pine. Here the measurements are 2400 mm in length, 94 mm in width, and 19 mm in thickness.
Well, you can choose your own desired size planks. Just be careful while calculating the angles.
So, take proper measurements and cut out three equal lengths to make the outer triangle. According to the design, the length should be 600 mm.
Then, set the band saw to 30 degrees and cut out the wood. Remember, the workpiece is set correctly while making the cuts.
Also, the two triangles should reflect each other. It should look like an equilateral triangle when you view it from the edge plank.
If you fail to cut it properly, you won’t get the desired shape. So be more patient to make sure your workpiece. Your patience will help you to cut in the correct direction.
Step 2 of 4: Attach The Pieces
So, the next step is to glue the three lengths together. This will form the outer triangle. Here you need to use a good quantity of wood glue.
Also, use a ratchet-style clamp in order to squeeze it together.
Are you planning to make a shelf here?
Then in this step, you should reinforce the joins with screws for safety.
Now, let the glue dry. Then start working on what lengths you need for your inner triangle.
For that, you need to mark the halfway point of the outer triangle. Mark it along each of the sides of the outer triangle. Then use a metal ruler to measure the distance over the triangle.
Don’t forget to mark it. You can mark it using a marker or whatever you prefer.
Then you need to make two pieces using the measurements you recently took. After that, with those two pieces in place, you need to re-measure the third piece.
Remember, don’t take the three measurements in the same size. It’s because the inner triangle fits in a slightly different manner from the outer triangle.
Here, one of the three pieces has to be slightly shorter.
Step 3 of 4: Attach The Inner Triangle
Now, you need to find a clamp to glue the inner triangle. Make sure to glue all sides carefully.
After gluing all the sides of your inner triangle in place, take the measurements again.
Then you need to cut down two short lengths in order to add more shelf space. Then glue them in one place together.
Well, this step is totally optional. It depends on your design.
Step 4 of 4: Final Touches
You’re almost done. You can use any kind of color to make it look more beautiful. You can use a brush to color it in the right way. Let it dry and here you’re done!
Keep one more thing in mind. You should use a good-quality clamp for this work.
So, now you can mount it on your wall, you can keep little plants on it. But if you don’t like wall mounting, free-standing on a sideboard or table is also cool.
Frequently Asked Questions
Question: How can you cut wood at home without a saw?
Answer: Well, you can cut wood by having some tools at your home. Even if you don’t have a saw. For example- using a knife, axe, chisel, etc.
Question: How much thin can you cut your wood?
Answer: Generally, thin wood is classified as any thickness that is under ⅛ of an inch. Thin woods can be expensive also.
Question: Is plank wood and strip of wood the same?
Answer: Well the answer is no. Basically, when the wood comes in wider bigger strips it’s called a plank. It depends on the client’s demands.
Wrapping Up
So, that’s all you have to do to cut an equilateral triangle. Hopefully, you’ve realized how the work is to be done.
Now you know how to cut an equilateral triangle out of wood?
Please share your experience with us in the comment section.
Good luck! Stay safe!
- How To Hide A Shed From HOA (5 Easy Hacks) - September 8, 2023
- How to Hang Tools in a Suncast Shed (7 Easy Steps) - August 31, 2023
- How To Hang Stuff In Resin Sheds (5 Easy Steps) - August 29, 2023